Showing posts with label Stampin' Up. Show all posts

Saturday, March 23, 2019

Back to basics: Masculine birthday card - I love you so "mush" - Altenew

Hola,
One of the biggest challenges I have as cardmaker is making masculine cards. 


So for today's back to basics I made a cute and colorful masculine card.
I went through my stamp catalog and found this Altenew stamp set - 
the sentiment was what did it for me.
"You are such a fungi!"
Too cute!!
This set was a December 2017 release and I had not used it yet - so today was the day!!! 
And I am so glad I did!


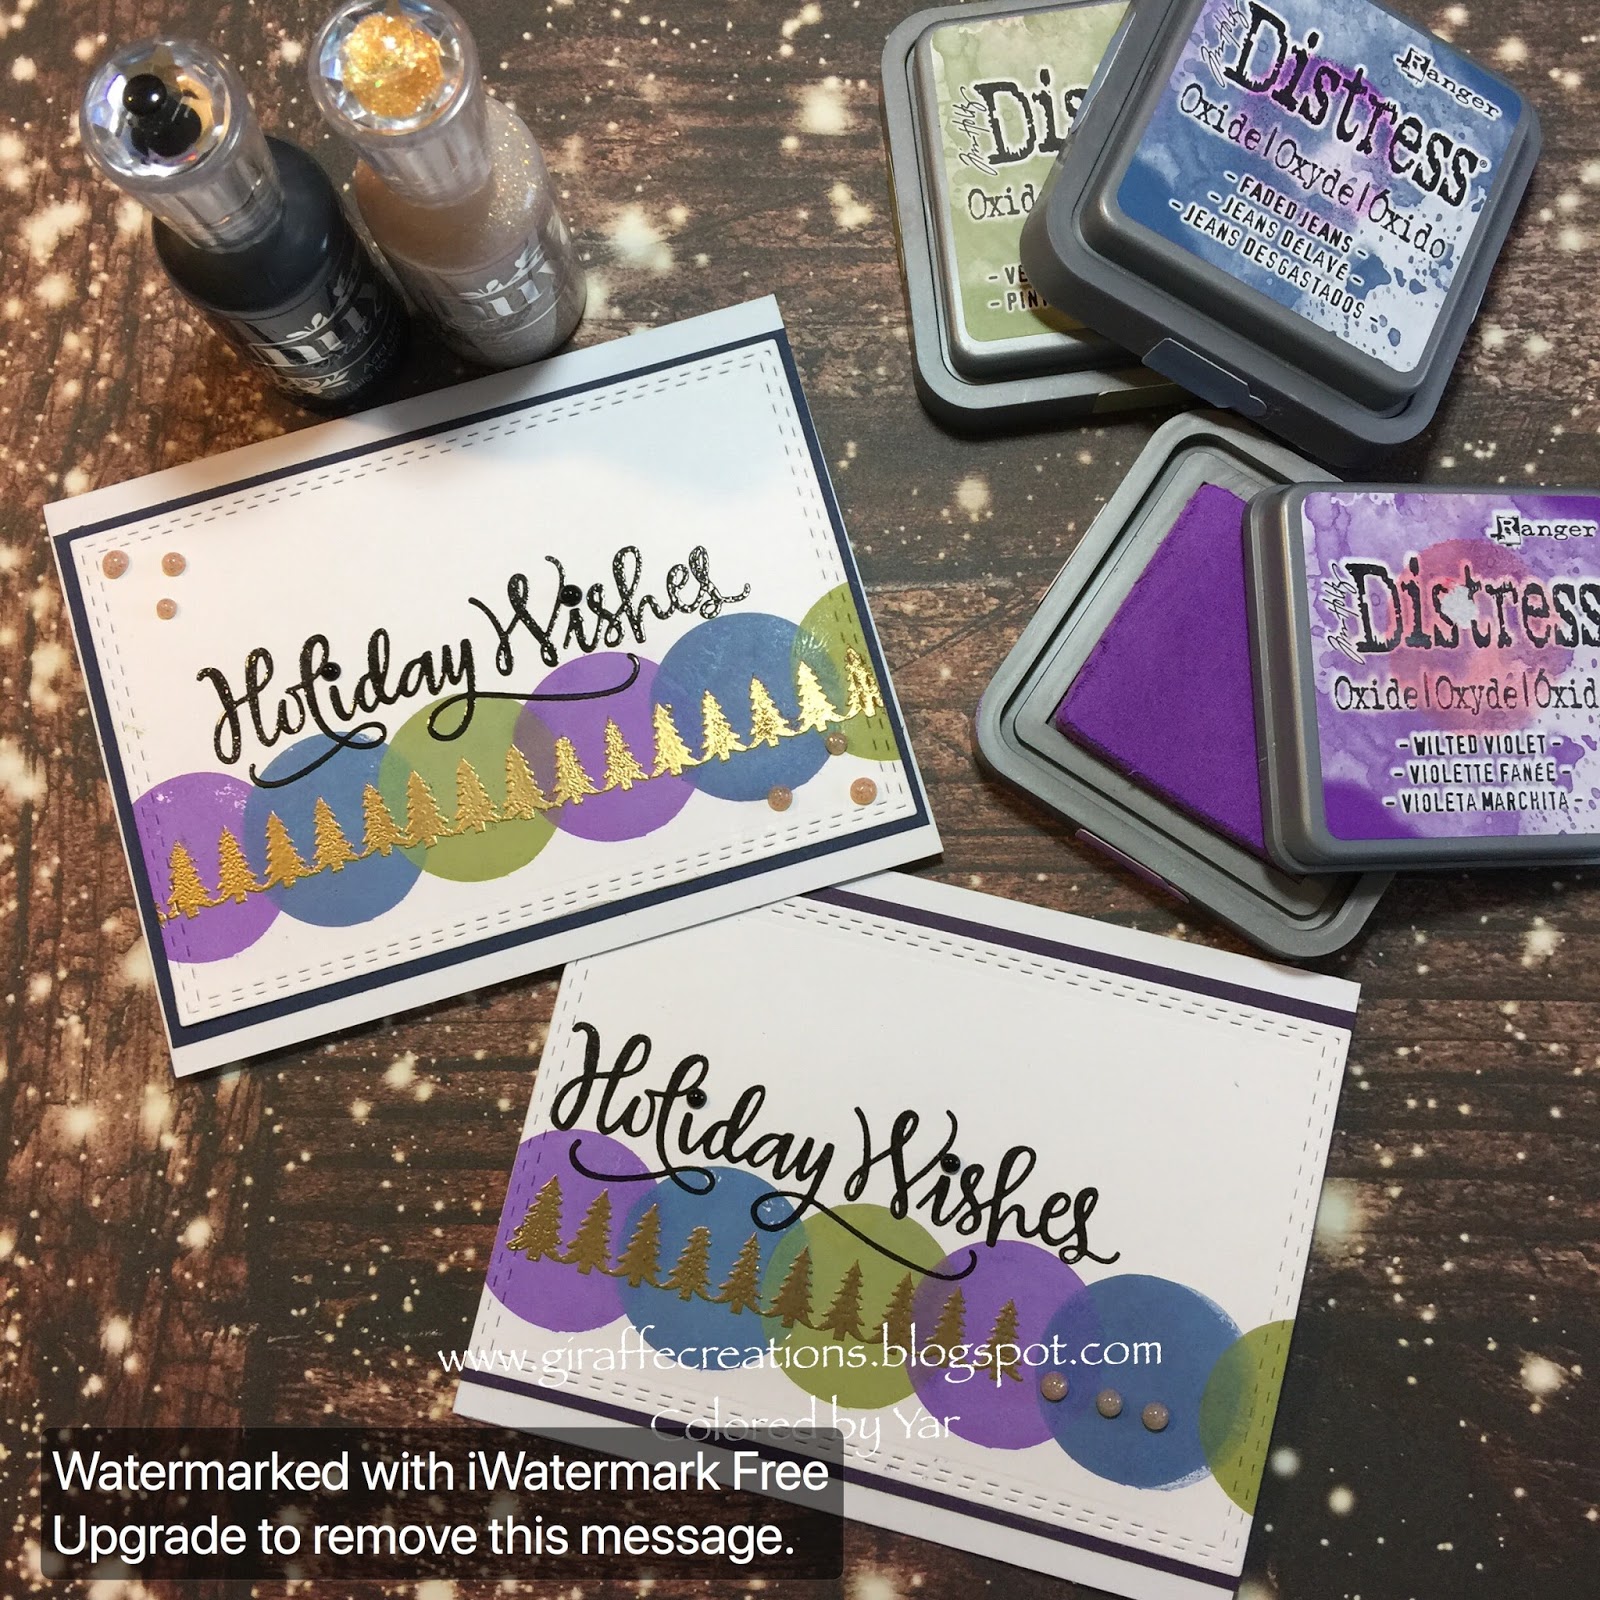
What is back to basics?
My first love for card making started with stamps and ink.
So for this series I am getting out my stamps and my inks and using them!

What I used:
Stamp sets: 
Altenew - Love you so "mush"
Stampin Up Label something
Stamp at home - Big grid background stamp  - this stamp is huge and I love it! I bought it at the Stampin & Scrapbook EXPO in MA about two years ago.

Inks & Paper:  
All my inks and color papers are Stampin up
Crumb cake (ink only)
Summer Sun - retired
Lemon Lime Twist
Berry Burst
Pumpkin Pie
Pacific Point

Card base: Neenah Desert Storm
White paper: Hammermill 80#

Die set: MFT Stitched MOD rectangle Stax
Punch: Stampin Up Modern Label Punch

Nuvo drops in a lot of colors!

Since I had all the inks out already, 
I decided to create some extra cards for my Birthday Clubs.
Here they are!!


If you have this stamp set, 
get it out and create something cute!

Hope you enjoyed the cards!

Adiós,
~~Yar

Sunday, February 24, 2019

Scrapbooking: FANTASTIC Summer of 2010

Hola!

Remember the mists I made back in January?
I have been using them to create mixed media layouts!
And loving it!

This is my latest one "Fantastic Summer of 2010"

 What I used:

To make this layout I used a cut file from Paige Evans Taylor, 
properly titled "FANTASTIC" 

I used my scan and cut and white, thick Darice 12 x 12" cardstock.

I used Stampin Up Naturally Eclectic Designer paper series

One of my goals is to incorporate more stamps into my layouts,
for this one I used two different stamp sets:
1.  Stampin' Up! "Let's get away"


2. Simon Says stamp "Pool Play"

To add to the colorful feel I added a bunch of embellishments
I have collected through the years!


Navy blue embellishments.
The clear die cuts are from Spice Market.


This is the dark teal corner!
And the light greenish corner below! 
Flowers are from Maggie Holmes!


Orange corner number 1. is at the F
And orange corner number 2 is by the C.
I do love orange!
Buttons are from Stampin Up. 


This layout is about my love of camping, 
so I wanted to add the camper stamp.

I hope you liked it!
Adios,
~~Yar


Wednesday, July 11, 2018

MFT Summer School 2018 -Day 3 Creating Repetition on a card

Hola


So excited to be here again!
I am participating in the 2018 MFT Summer School and
can't wait to show you my new card!
I am rushing these posts since the challenge ends tomorrow :) 
7/12/2018

Here is day 3 - Creating Repetition on a card.

What I used:
I used Copic Markers to color my image
Stamp: MFT Cool Day 
Sentiment: Merry Christmas from Heartfelt "Ornate Sleigh"
Background Gina K Wonki Rectangles
Banner die: MFT First Prize
Wink of Stella Clear
 Red paper Recollections
Ink: Stampin' Up Bermuda Bay

Copic markers used.

ink used: Stampin' Up Bermuda Day - LOVE this color!

Stamps used, MFT Cool Day and Heartfelt Creations "Ornate Sleigh"

One last look at the card...
I added wink of stella to the mittens and
Glossy accents to the white part of the mittens - which you can't see since
apparently I forgot to take a picture once it dried :)


enjoy!
~~Yar

Tuesday, July 3, 2018

So Very Sorry: Sympathy Cards

Hola!

Nobody likes to make sympathy cards, 
unfortunately this week I needed two.

I had previously created some backgrounds with Distress Oxide Inks and
decided to use some of my Background dies
for a clean look.
To step it up I did a technique from Jennifer McGuire,
using glossy accents to create a stained glass look.

Check out the stained glass look.


The stamp set I used is from Stampin Up: So very.
I also used stitched banners to create the sentiment flag.
I added a few pearls from my stash as well.

I hope you liked them, they inspire you, and may you never need them.

Happy day!
Enjoy,
~~Yar


Friday, November 17, 2017

2017 Christmas Card Series Card 2

Hola!
Here is card #2. 
Have Yourself a Merry Little Christmas
Some goodies I used:
Three Distress Oxide Inks:
Worn Lipstick
Faded Jeans
Fired Brick
Versamark ink
Gold embossing powder
NUVO drops Strawberry
NUVO drops Gold
Paper: Neenah Desert Storm 100#
Paper Stampin Up: Blue
Other goodies:
Stampin' Up: Stipples Shapes (the circle)
Hampton Art: Deer (the trees)
Happy Holidays stamp set
Lawn Fawn Stitched Rectangles
Here is one last close-up of the card!
I hope you liked card Number 2.
Back soon!
~~ Yar 

Sunday, November 12, 2017

Let the 2017 Christmas Card Season begin!!!

Hola!
Welcome to my 2017 Christmas Card Series!
Card 1. Holiday Wishes

I LOVE the  holidays!
I love the shopping, the long lines, 
the list making
EVERYTHING! 
So as many of you...I love making Christmas cards.
So here is my
Card 1. Holiday Wishes
These two cards are basically the same design.
I used three Distress Oxide Inks:
Wilted Violet
Faded Jeans
Peeled Paint
Versamark ink
Gold embossing powder
Versafine Ink
NUVO drops Black and Gold
Stampin' Up: Stipples Shapes (the circle)
Hampton Art: Deer
Happy Holidays stamp set
Here is a last look at the cards!  
I hope you liked card 1.
See you soon!
~~Yar

Monday, May 8, 2017

Hey, Chick Mother's Day Card #2

¡Hola!

I can't get enough of this chicky!!
Card Number 2 uses a different color combination than card #1.

For my second card I used:
Stamp: SU Hey, Chick
Stamp: SU Crazy about you (Happy Mother's Day)
Dies: SU Just Sayin'
Dies: Spellbinders Wonky Rectangles
Dies: XL Screen die from my stash
Die: Lawn Fawn Small Stitched Rectangles set
Embossing folder: SU Hexagons
Wink of Stella


Copic Markers used:
Yellows:
YR24, Y35, Y15, Y11
Other colors are pictured below:


Some serious Wink of Stella!

Hope you enjoyed this combination!
--Yar


Sunday, May 7, 2017

Hey, Chick Mother's Day Card & Process Video

¡Hola!

Mother's Day is upon us and I am so far behind
it is not even funny!!  
Who's with me?

Anyway, I need to ship most of my cards 
so today is the day! 
I will get most of my Mother's Day Cards done today, 
and you will be part of my progress.

Card #1 is for one of my best friends Danielle. 
I am meeting her for coffee later today so I need to get it done quick! 
 I chose this stamp set specifically for Danielle since she loves chickens so much! 
I knew she would like the card!! 

***UPDATE: Danielle loved her card :)

For this card I filmed the Copic coloring portion.  
Watch on Youtube:  

For my first card I used:
Stamp: SU Hey, Chick
Stamp: SU Crazy about you (Happy Mother's Day)
Dies: SU Just Sayin'
Dies: Spellbinders Wonky Rectangles
Dies: XL Screen die from my stash
Die: Lawn Fawn Small Stitched Rectangles set
Embossing folder: SU Hexagons
Wink of Stella

One last look at card #1!
Hope you liked it!
-Yar


Monday, April 24, 2017

Fanfare Fold Card

Hola!

Today I am working on the card for the Fanfare Fold Card Swap.

This is the first time I do one of these cards and I really liked it.  
Beware: Extra postage required!
This card is thick and bumpy, 
I had to add an additional $0.21 stamp to mail within the USA.

To make this card:

Step 1. Base card is a regular A2 size card 
I used 110# white cardstock from Recollections
dimensions: 4 1/4" x 11"
folded in half: 4 1/4" x 5 1/2"

Step 2. You will need a piece of paper measuring 4 1/4" x 11" 
for the folded part of the card (I used Stampin' Up Pool Party paper) 

Step 3. Score the paper at  (I used Pool Party):
1.5"
3"

5.5"

8"


Step 4. Cut the panels to decorate each fold. 

(I used designer paper from the Sweet Sorbet collection from Stampin' Up):
4"x2 3/4"

4"x2 1/4"

4"x1 1/4"

4"x2 1/4" - for the message panel.

Step 5. Adhere panels and assemble your card and decorate!


I hope you enjoyed the card!

Have a great day!
Adiós,
~~Yar

Thursday, March 23, 2017

A Card to Welcome Baby Girl Abby

¡¡Hola!!


Today I want to share some BABY happiness with you.
My friend Leesha just welcomed her very first granddaughter - Abigail.

I was so happy for her I had to make her a card to share in the joy of a brand new life.

For this card I used:

Stamp sets: SU Buggies & Booties and the SU Fun Phrases
Darice Embossing folder: Baby Quilt
Wink of Stella
Glossy Accents
Copic Markers (see list below)


I colored the card using the following Copic Markers:


I used Wink of Stella and Glossy Accents on the baby's blanket.


Here is another look at the card.


Hope you enjoyed it & got some creative ideas of your own!
Adiós,
~~Yar


Saturday, March 11, 2017

Hey Chick!: Thank you postcards - Blog post & YouTube process video

¡Hola!


I wanted to say Thank you to the friends who ordered during my Stampin' Up (SU) party.
So when I got my goodies, I had to play right away.

To create these postcard I used:
Stamp: SU So very much
Stamp: SU Hey, Chick
Stamp: SU Wanderlust
Inks: SU Blushing Bride
Ink: Versafine Black ink
Embossing powder: SU clear
Paper: SU Blushing Bride &
 100# White Cardstock from Michael's
Embossing folder: SU Honeycomb 
(Although I decided not to use it in subsequent cards)
Dies: Lawn Fawn Stitched Rectangles

Back of the card:
Here I used the "postcard" and "heart" stamps from SU's Wanderlust. 
 I used 100# white card-stock for stability. 
 Using white card stock allowed me to write 
a personalized message to each recipient.


Overall, a cute and easy to make Thank you postcard to express my gratitude!

Another closeup at the postcard without the Honeycomb embossing folder. 
I like this design better, so I didn't used the the embossing folder in subsequent cards.


Want to see how I made them?
Watch below   |  or watch on YouTube


Enjoy and keep on stampin'!
Adiós,
~~Yar