Wednesday, June 20, 2018

Mis Quince: Documenting Bri's Quinceañera (#1)

Hola!


Did you know I am Puerto Rican?
In Latin countries we celebrate when our daughters
turn 15 - it's called "El Quinceañero", which literally means
the 15th birthday. 

Spanish grammar lesson begins here: ending in o vs. a.
El Quinceañero: When the word ends in an "o" it refers to the party itself.
La Quinceañera: When the word ends in an "a" it refers to the girl who turns 15.
See if you follow. 
My daughter Bri is a quinceañera, 
and we celebrated her 15th birthday by throwing her a quinceañero.
Spanish lesson over :)

Quinceañeros are a big deal in Latin countries, 
its close to a small wedding I would say.
So documenting it is important.

I am planning to scrapbook a few pictures for her
and I will create a small series which I will tag,
"Mis Quince"

I am using an old page kit from
Studio Calico
and goodies from my stash.

I hope you follow it and enjoy it!

Adiós,
~~Yar


Monday, June 18, 2018

Decorating the inside of my cards and envelopes

Hola!

Card 1 - inside
A quick post today.
I am back because I forgot to add these
photos to my last blog post.
This is the salt and pepper of my cards.
Card 2 - Inside
Personalization:
Once I finished everything
I added the name of the recipient to each envelope.
I hope Jack & Christopher love their birthday cards
Happy 6th bday boys!

Envelope 1. Christopher's
Envelope 2. Jack's

More and more I find myself decorating the inside of my cards 
and the envelopes too. It adds a little something!

Hope you liked them!
Adiós,
~~Yar

Friday, June 15, 2018

Creating Backgrounds with Distress Oxide Inks

Hola!


I am so excited to share my new creations with you!
Last December I got a few extra Distress Oxide ink colors 
so I decided to swatch them today - yeap, It's June!

While swatching I decided to create some backgrounds
and try them out. I have not fallen in love with oxide inks, 
so I am going to give myself a chance. 
My biggest thing was I didn't want t buy more paper -
and I did not!! Instead of investing on Yupo Paper
I used Kodak Photo Paper from my stash.
I have had Kodak photo paper since 2010 - never used it! 
I got them for 1 penny at Stapples -
 back when they used to do
the penny sales!

I created three cards and they look very different
although I used the same elements.

I loved creating these backgrounds so much I will be making a video soon.
Here they are!!

Card 1. Multicolored
I created this card right after swatching so all the colors 
were still on my mat. No waste!!!
While swatching I realized my brand new black oxide is completely dry :(
What a disappointment. 
Nothing I can do I guess, since I purchased it in December.

Background dies (Left) Birch Press Design 
and MFT You're Rawr-some


This next close up shows the dimension on this card. 
I chose to glue the tree straight to the paper,
the dino on the right has one level of foam squares,
and the dino on the left has two levels of foam squares.
I was hand delivering this card so it didn't matter how thick it got.
However, it was very tricky to get it inside of the envelope - so keep that in mind.

Check out the Wink of Stella on the dinos!!
And the colorful NUVO drops all over the background!


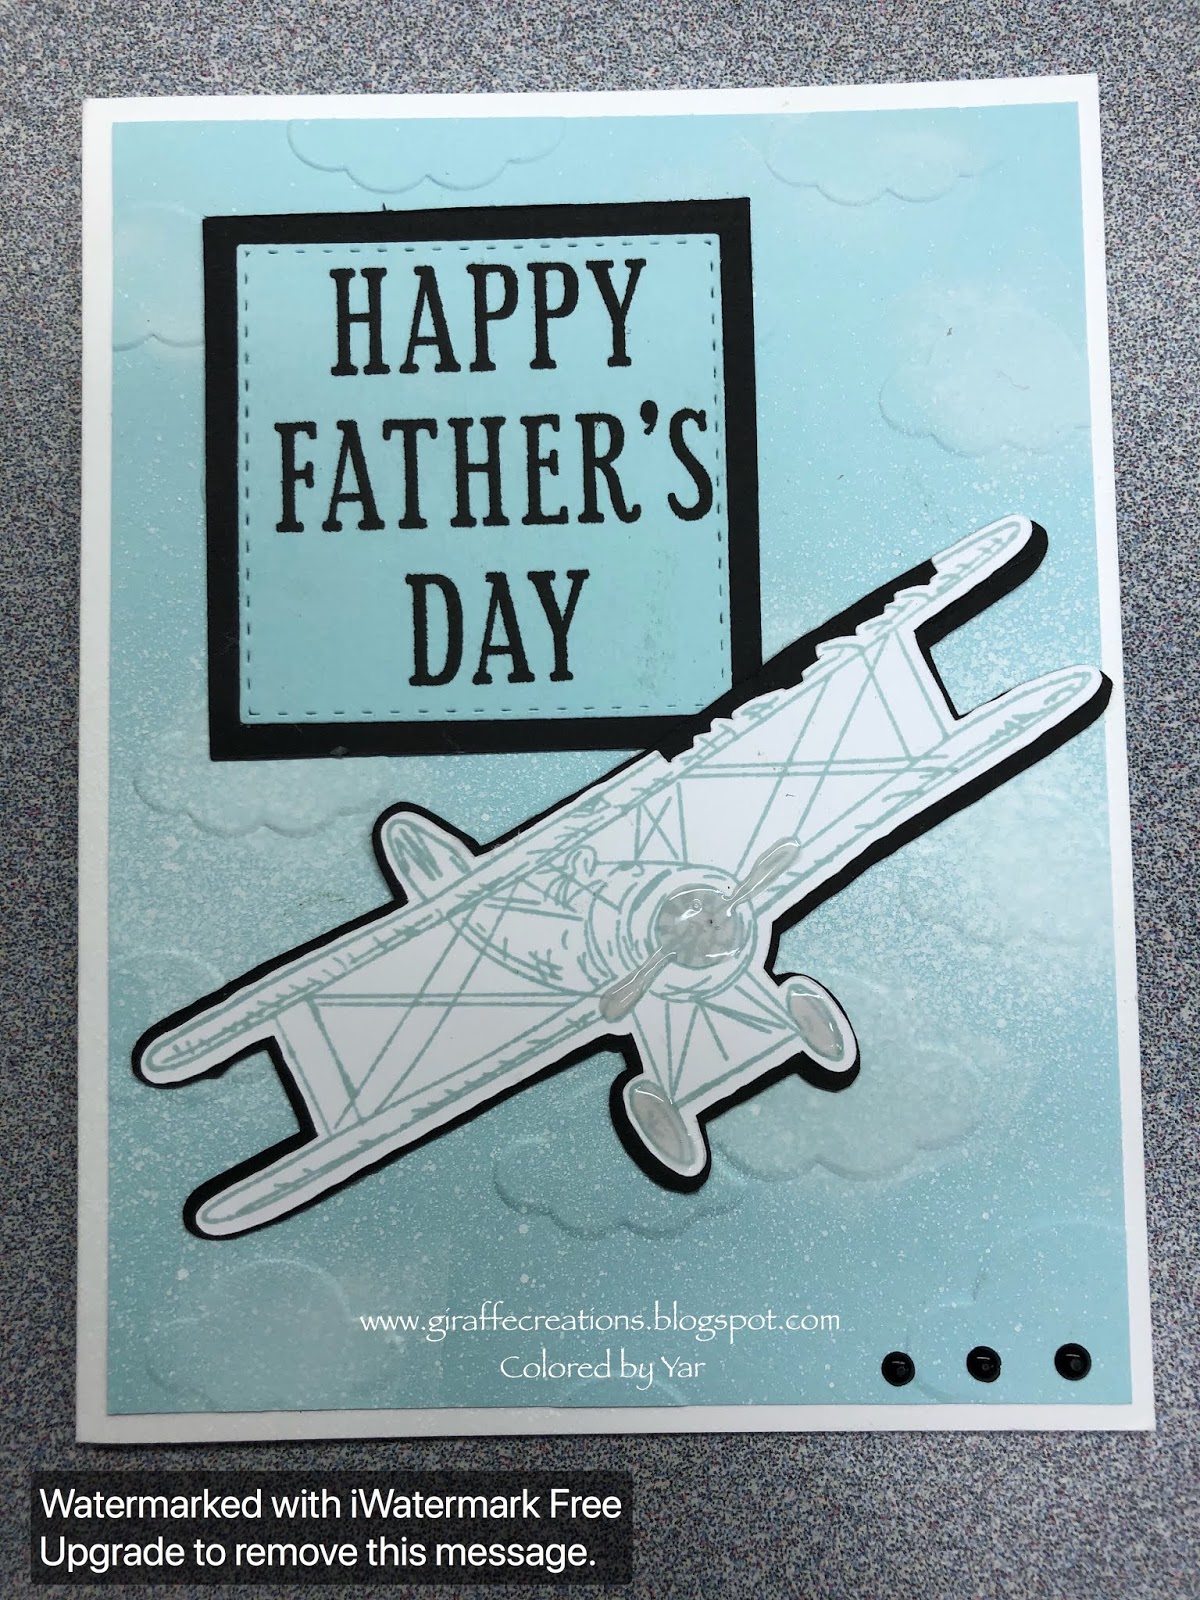
Card 2. Shades of Greens
I think this one is my favorite! I love both backgrounds, 
but I like how I used black card stock to mat my images.

Cutting the images:
I used my Scan N Cut 2 to cut the images and then created a shadow using 
black and Stampin Up Bermuda Bay. I do love this feature, which is why I thinks
the SNC 2 is a great investment.
Plus I no longer buy sets of stamp and dies together - saving me some cash!


Dimension galore!
The same oxide inks were used for cards 2 and 3. Here they are.


Card 3. Simpler background

Card 3 was created from what distress oxide ink colors
were left on my mat from creating Card 2.

I wasn't sure if I had enough, but I really liked the subtle look!
I added some washi from my stash to add a bit more color.

Another look at all three cards!
Let me know which one is your favorite.


enjoy!
~~ Yar

Saturday, June 9, 2018

Making a lot of cards at once - Happy Father's Day!

Hola!


It's been a very long time since I blogged and I want to get back to it.
I am part of a group called Happy Card Exchange 
and we were to create masculine birthday cards for each other.

I took advantage of my design and changed the "happy birthday" greeting to 
a "Happy Father's Day" greeting.

I created 18 cards using the same design, this is how I did it.
I am an engineer so I followed the "One step at time" technique,
where you do the same step over and over until you finish with that step.

Step 1. Stamping my plane image onto white card stock, Repeat 18 times

Step 2. Cutting the image. I used my Scan N Cut 2.

Step 3. Cutting the image's outline using my Scan N Cut 2

Step 4. Glue all the planes to their outline. 
I used the glue I got at the Heartfelt Creations booth at the Scrapbook Convention. 
It is really strong!
  

Step 5. Stamped the inside of the card using some puffy clouds from MFT's Somebunny.


What I used:
SU The Sky is the Limit (plane)
MFT's Somebunny (clouds)
SU Soft Sky Blue ink and paper
Darice Clouds Embossing Folder
Nuvo Drops - Clear and Onix Black
Black card stock
White Mr. Huggies Mist
White 100# from Michael's - used as card base 

 I hope you liked my card!
Here is one last look!


Have a great weekend!
Adiós,
~~Yar